This guide will help you easily navigate the Primary Settings to connect your streaming channel, customize video details, and Schedule your streams. We'll also look at some Advanced Settings like using third-party streaming software, adjusting privacy settings, and more.
Primary Settings
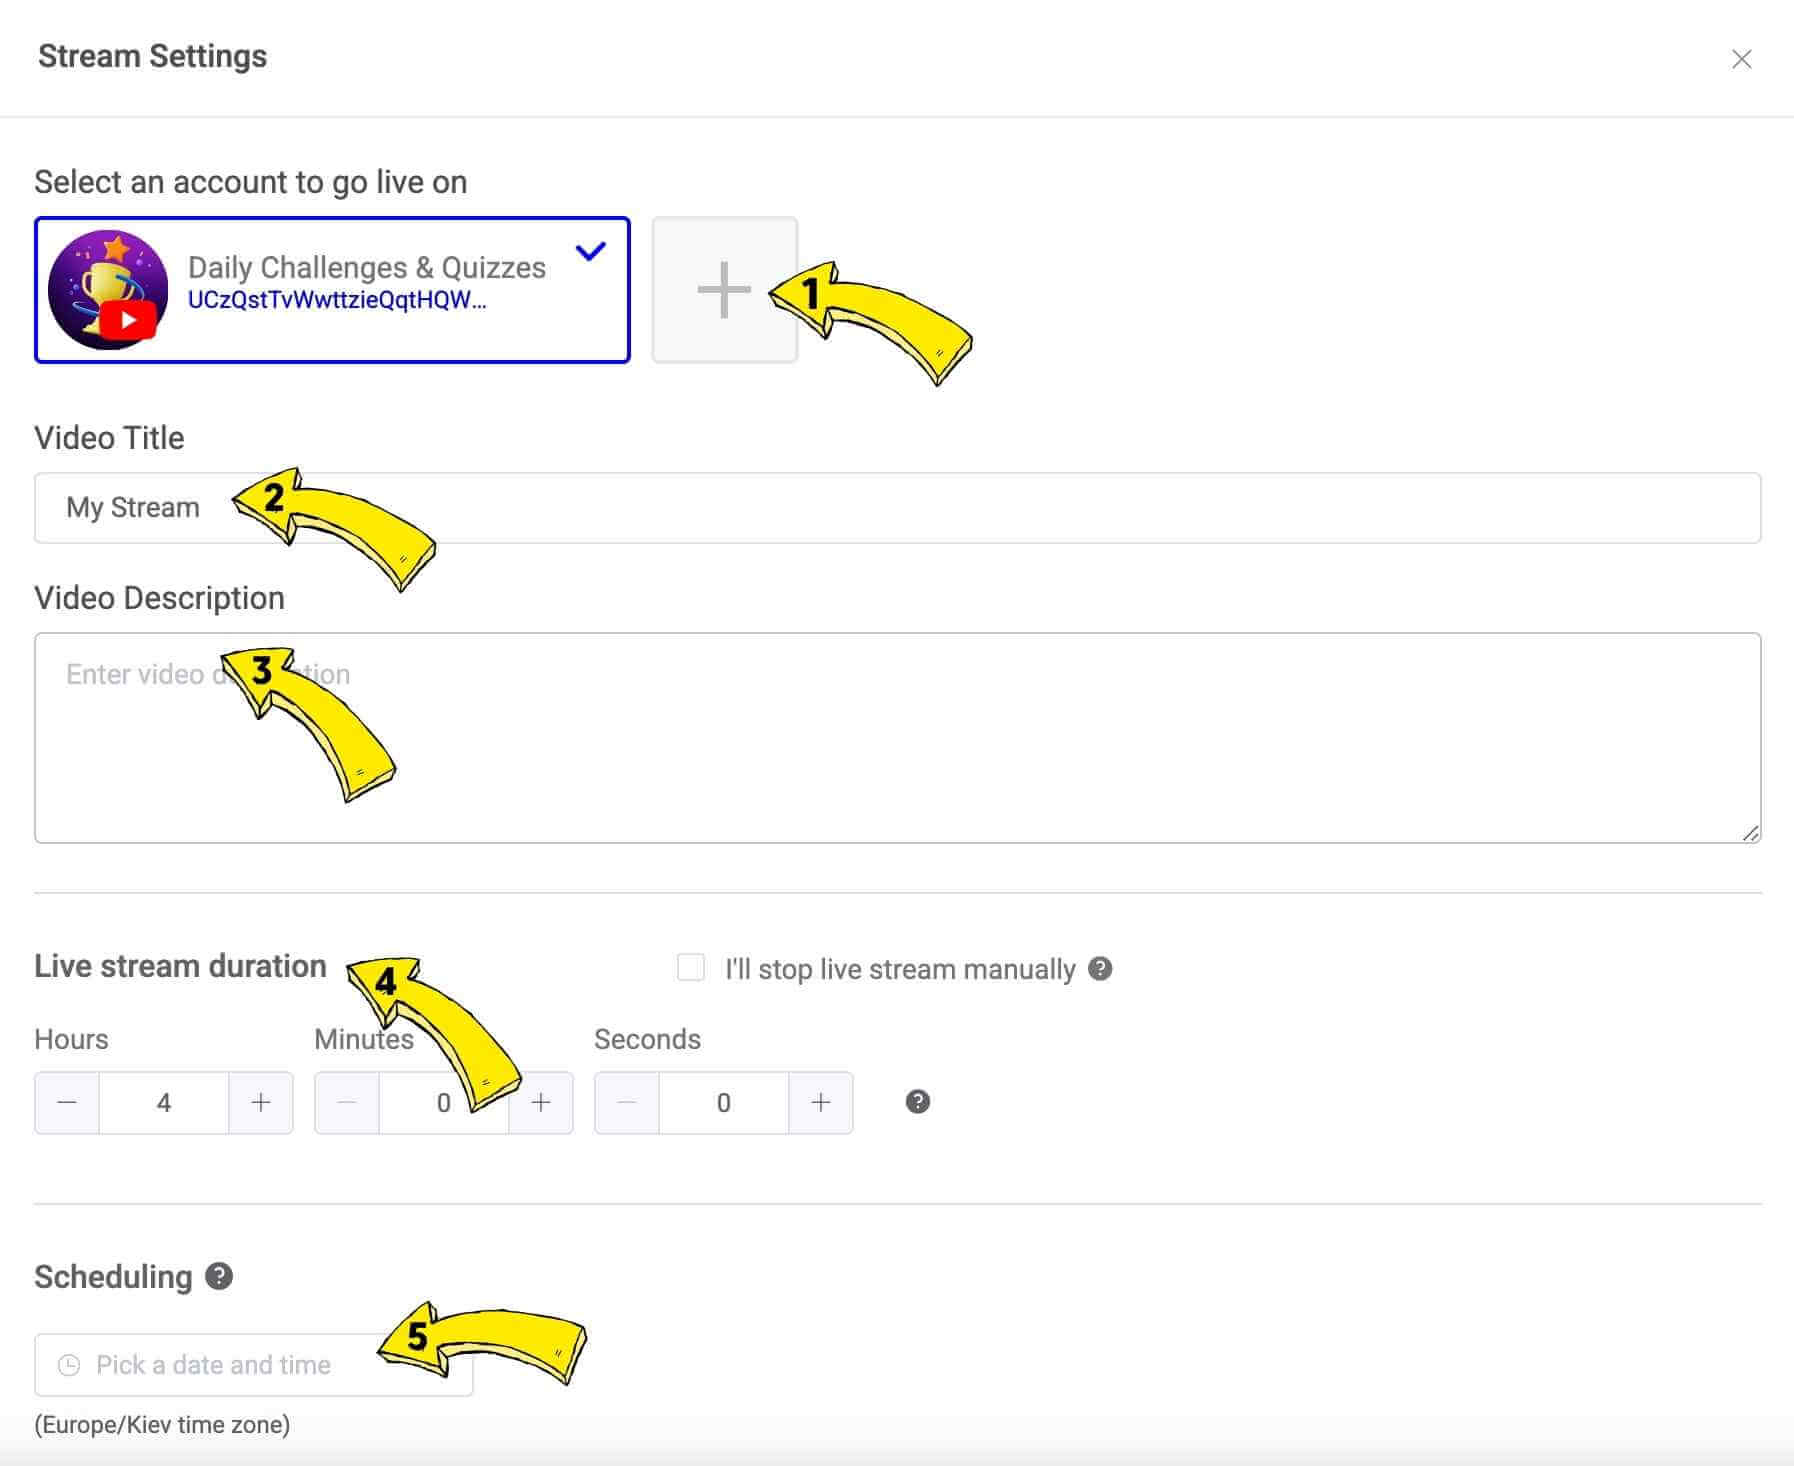
- Connecting Streaming Channel (Plus Icon) - Click the Plus Icon to connect one or multiple streaming channels.
- Video Title - This is the field where you can enter the title of your stream. You can also modify the title directly on YouTube when the stream is live or after it has ended.
- Video Description - This is where you can describe the content of your stream, include links to your products or services, and add hashtags.
- Live Stream Duration - Here, you can set the duration of your stream. Alternatively, you can select "I'll stop my stream manually" if you prefer not to pre-define the length.
- Scheduling - This is where you select a date and time to schedule your video. Videos can be scheduled on YouTube up to 2 weeks in advance. Note that the scheduling uses your device's time zone, so if you wish to schedule a stream for a different time zone, you'll need to calculate the time difference.
Scheduling
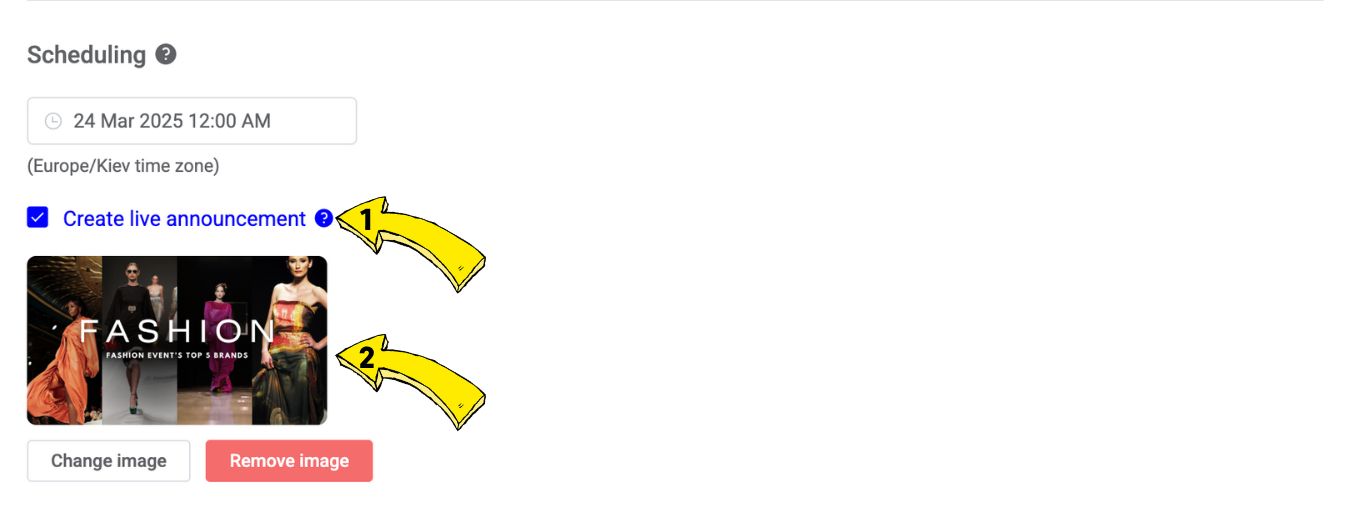
- Create live announcement - If you have enabled scheduling, you can select the option to create a live announcement. This ensures that the scheduled stream will immediately appear on your channel, allowing you to share a link and promote it in advance.
- Live Announcement Image - The image you upload under the "Create Live Announcement" option will be displayed only as part of the announcement for your stream.
Advanced Settings
- Plugin Mode for OBS/Wirecast/StreamYard/Ecamm and other software - Select this option to integrate this project with your preferred live streaming software instead of going live directly from LiveReacting.
- Connect to existing stream - Choose this option to connect to an already scheduled YouTube live event.
- Youtube Live Privacy - This is where you can select the privacy setting for your stream, choosing between Public, Private, or Unlisted.
- Thumbnail - This is where you can upload a thumbnail, which will be displayed when your stream is live and after it has been saved.
- Disable DVR - When enabled, viewers won't be able to rewind or replay parts of the stream while it's live. DVR (Digital Video Recording) allows viewers to pause, rewind, and catch up during a live stream.
- Made for Kids - Designates whether the video is made for kids. This affects how data is collected from viewers. Videos that are set as "made for kids" are subject to the Children's Online Privacy Protection Act (COPPA).
- Video Category - Select a category that best describes your content. Categories help viewers find your content and affect how YouTube recommends your video. Note: this list of categories is for US. Some categories could be not available for all locations.
- Playlists - Add your live stream to one or more playlists. Playlists help organize your content and make it easier for viewers to find related videos.You can select multiple playlists from the dropdown and your live video replay will be added to them once the stream is over.
- Tags - Tags help viewers find your content when they search on YouTube.
Enter descriptive keywords separated by commas. You can add up to 500 characters of tags. - Audio Quality - We recommend keeping the audio quality at 128k unless you are completely sure that the platform you are streaming to supports higher-quality audio input. Most social media platforms suggest using 128k, and attempting to stream at a higher audio quality could cause problems with live stream playback.
- Video Bitrate - Set a custom video bitrate for your stream. Leave on "Auto" for optimal quality based on your project settings.
