The Audio Playlist layer lets you queue multiple audio files that play back-to-back during a live broadcast. It's ideal for continuous background music, ambient 24/7 streams, or a scripted series of audio segments — with a full manager for reordering, searching, importing, and editing tracks live.
Adding an Audio Playlist Layer
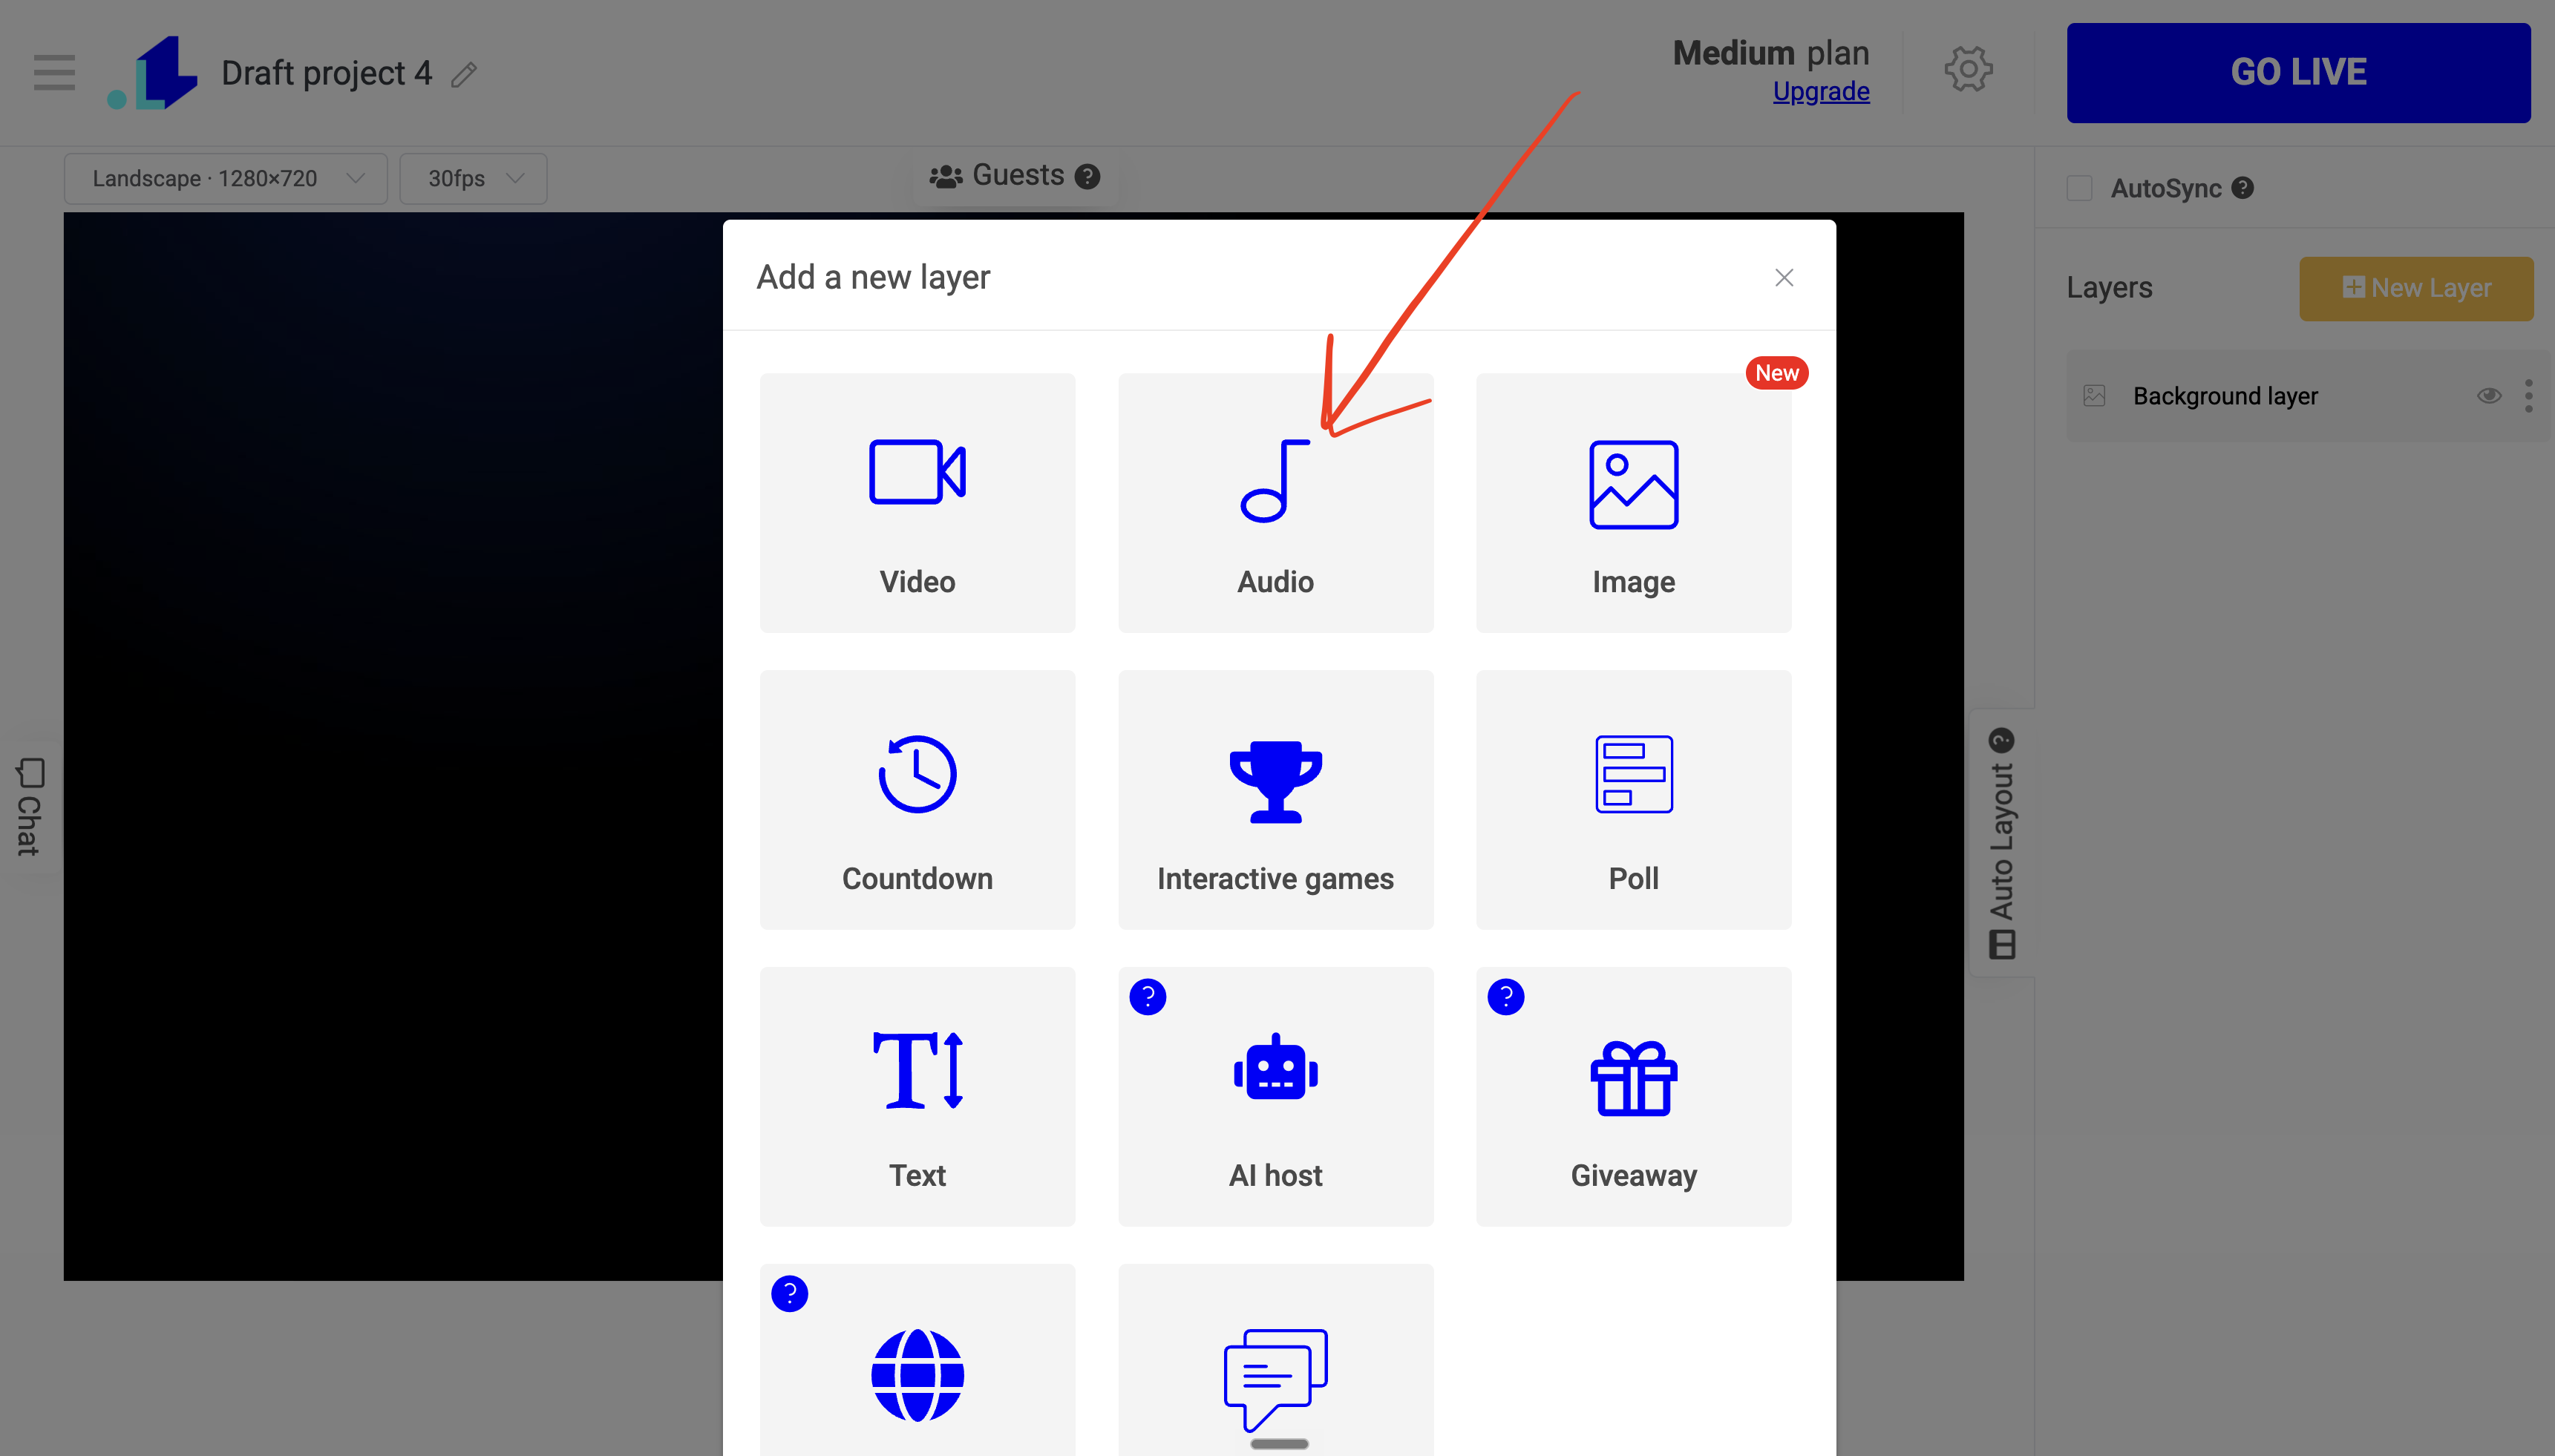
Step 1. In the editor, click New Layer in the sidebar, then choose Audio.
Step 2. Choose Audio Playlist.
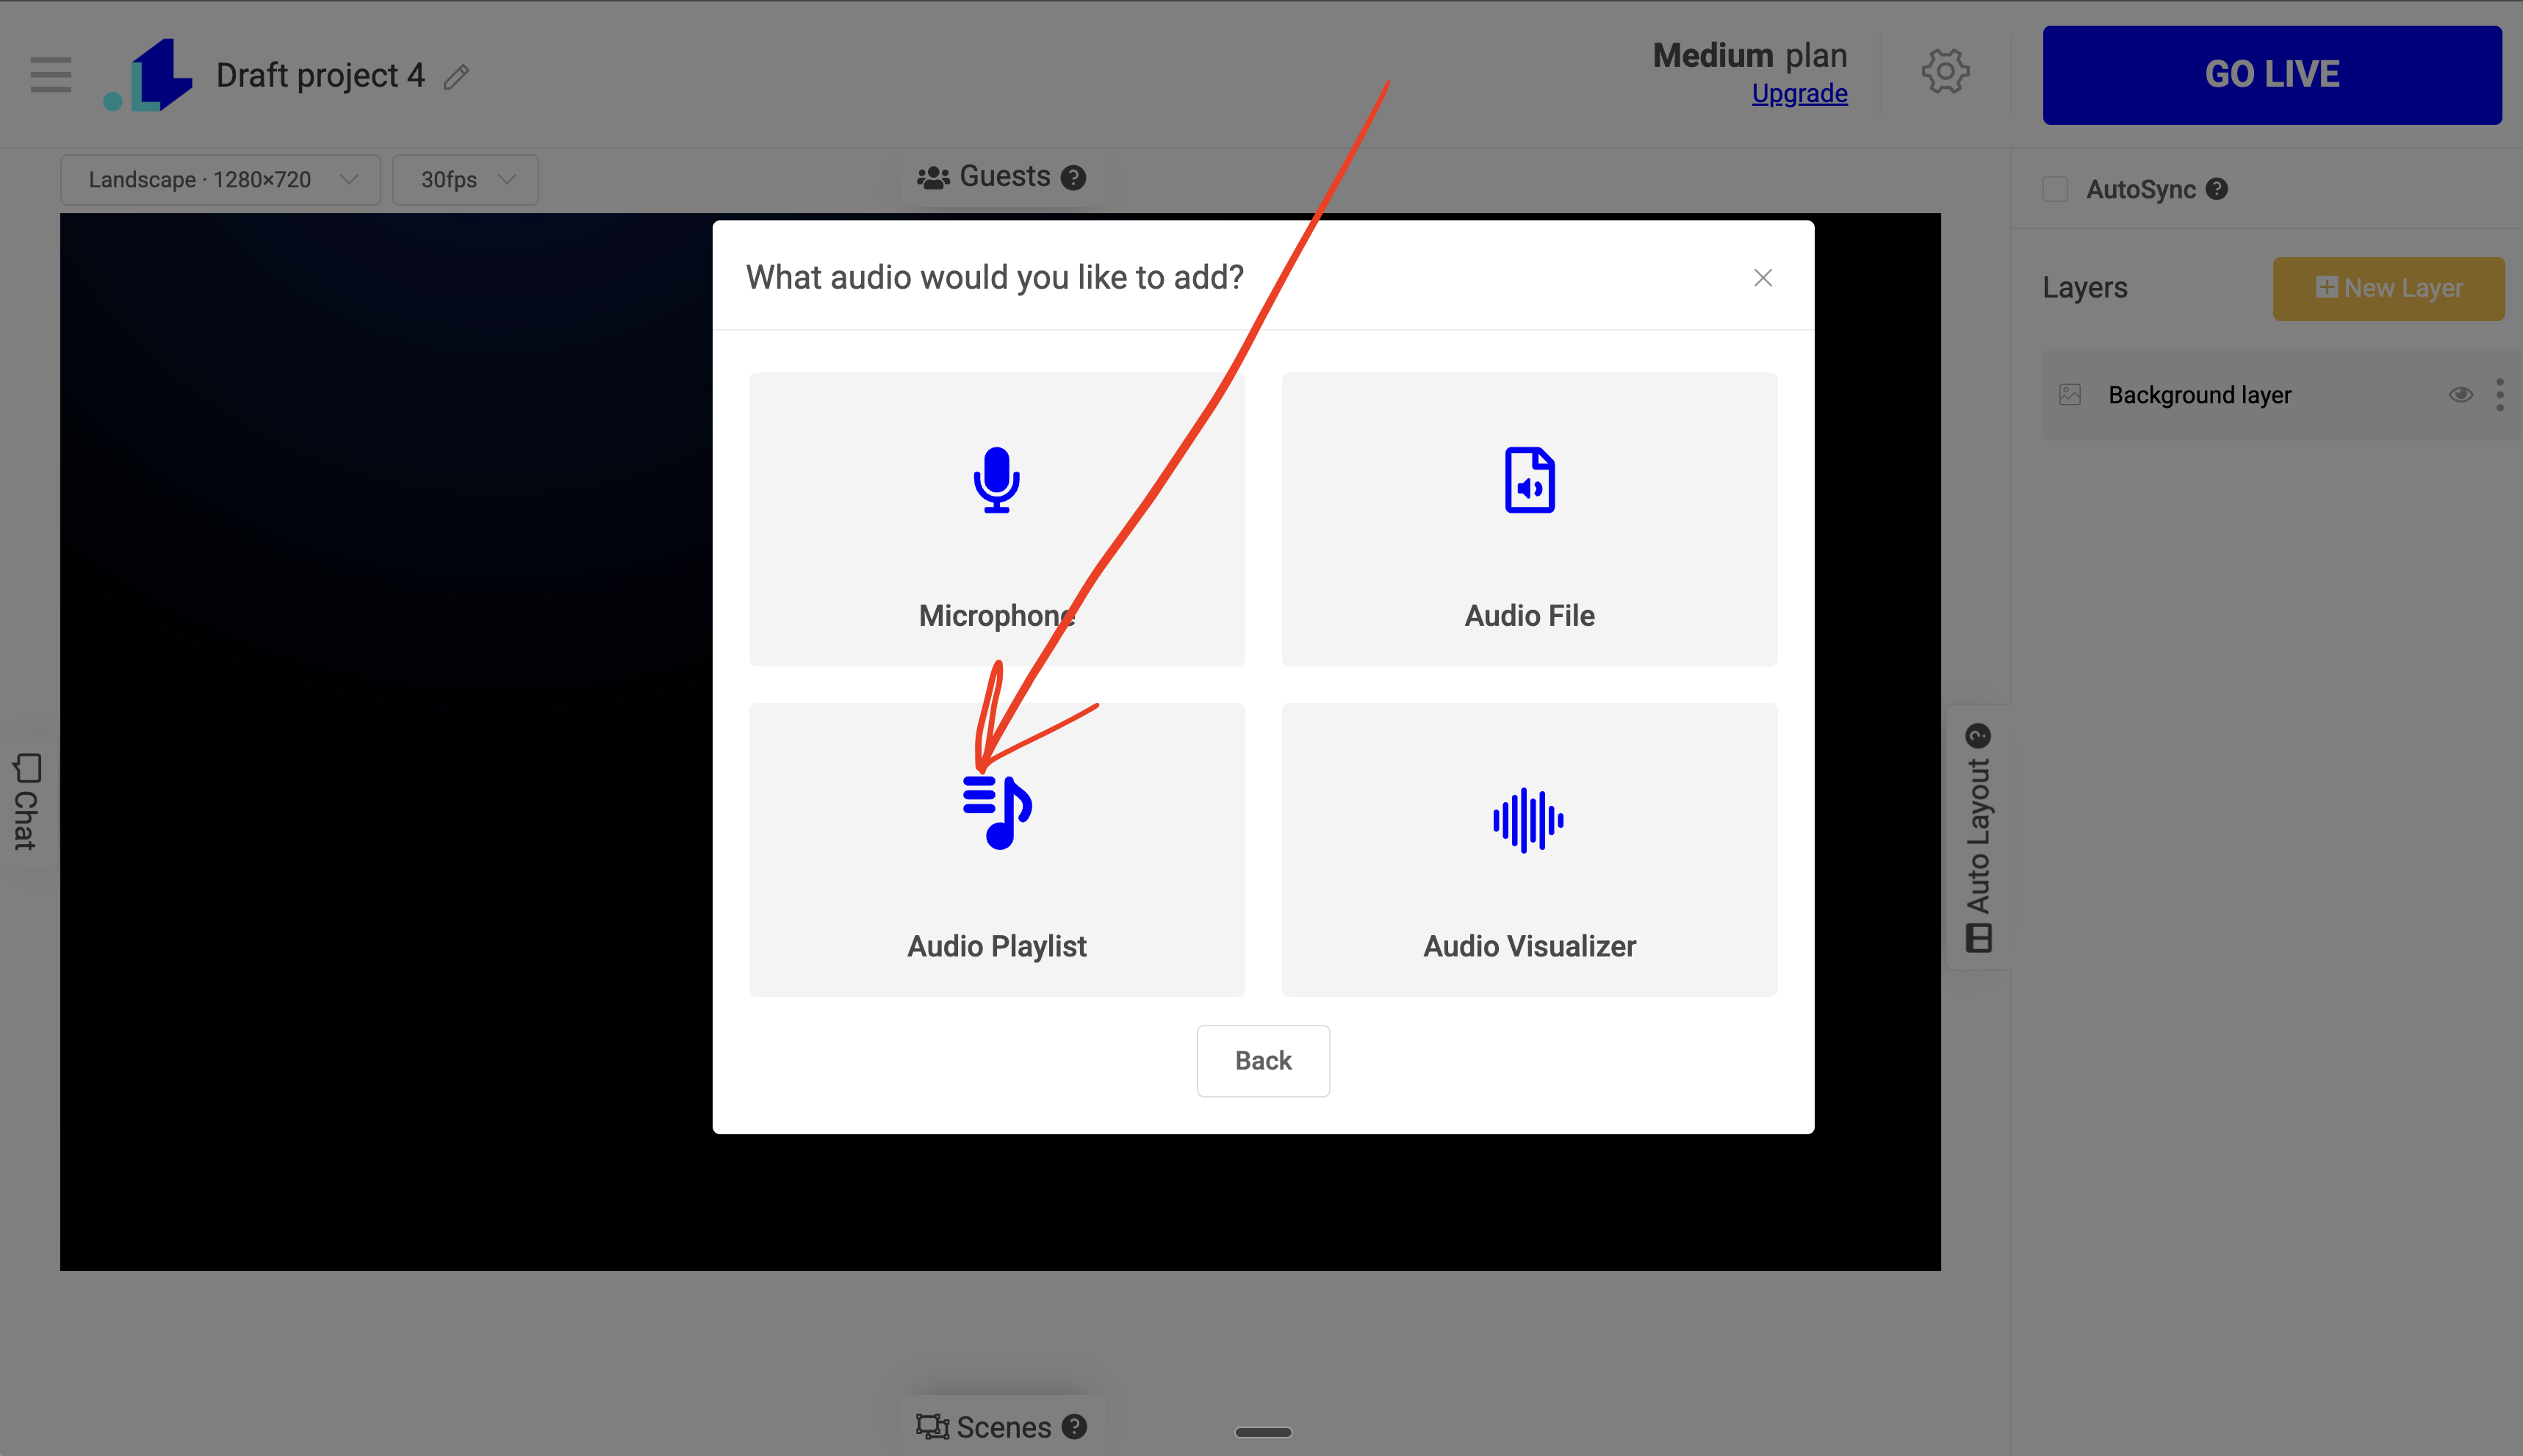
Note: A scene can hold only one audio source at a time — the Audio Playlist tile is disabled if the scene already has an Audio File or another Audio Playlist layer.
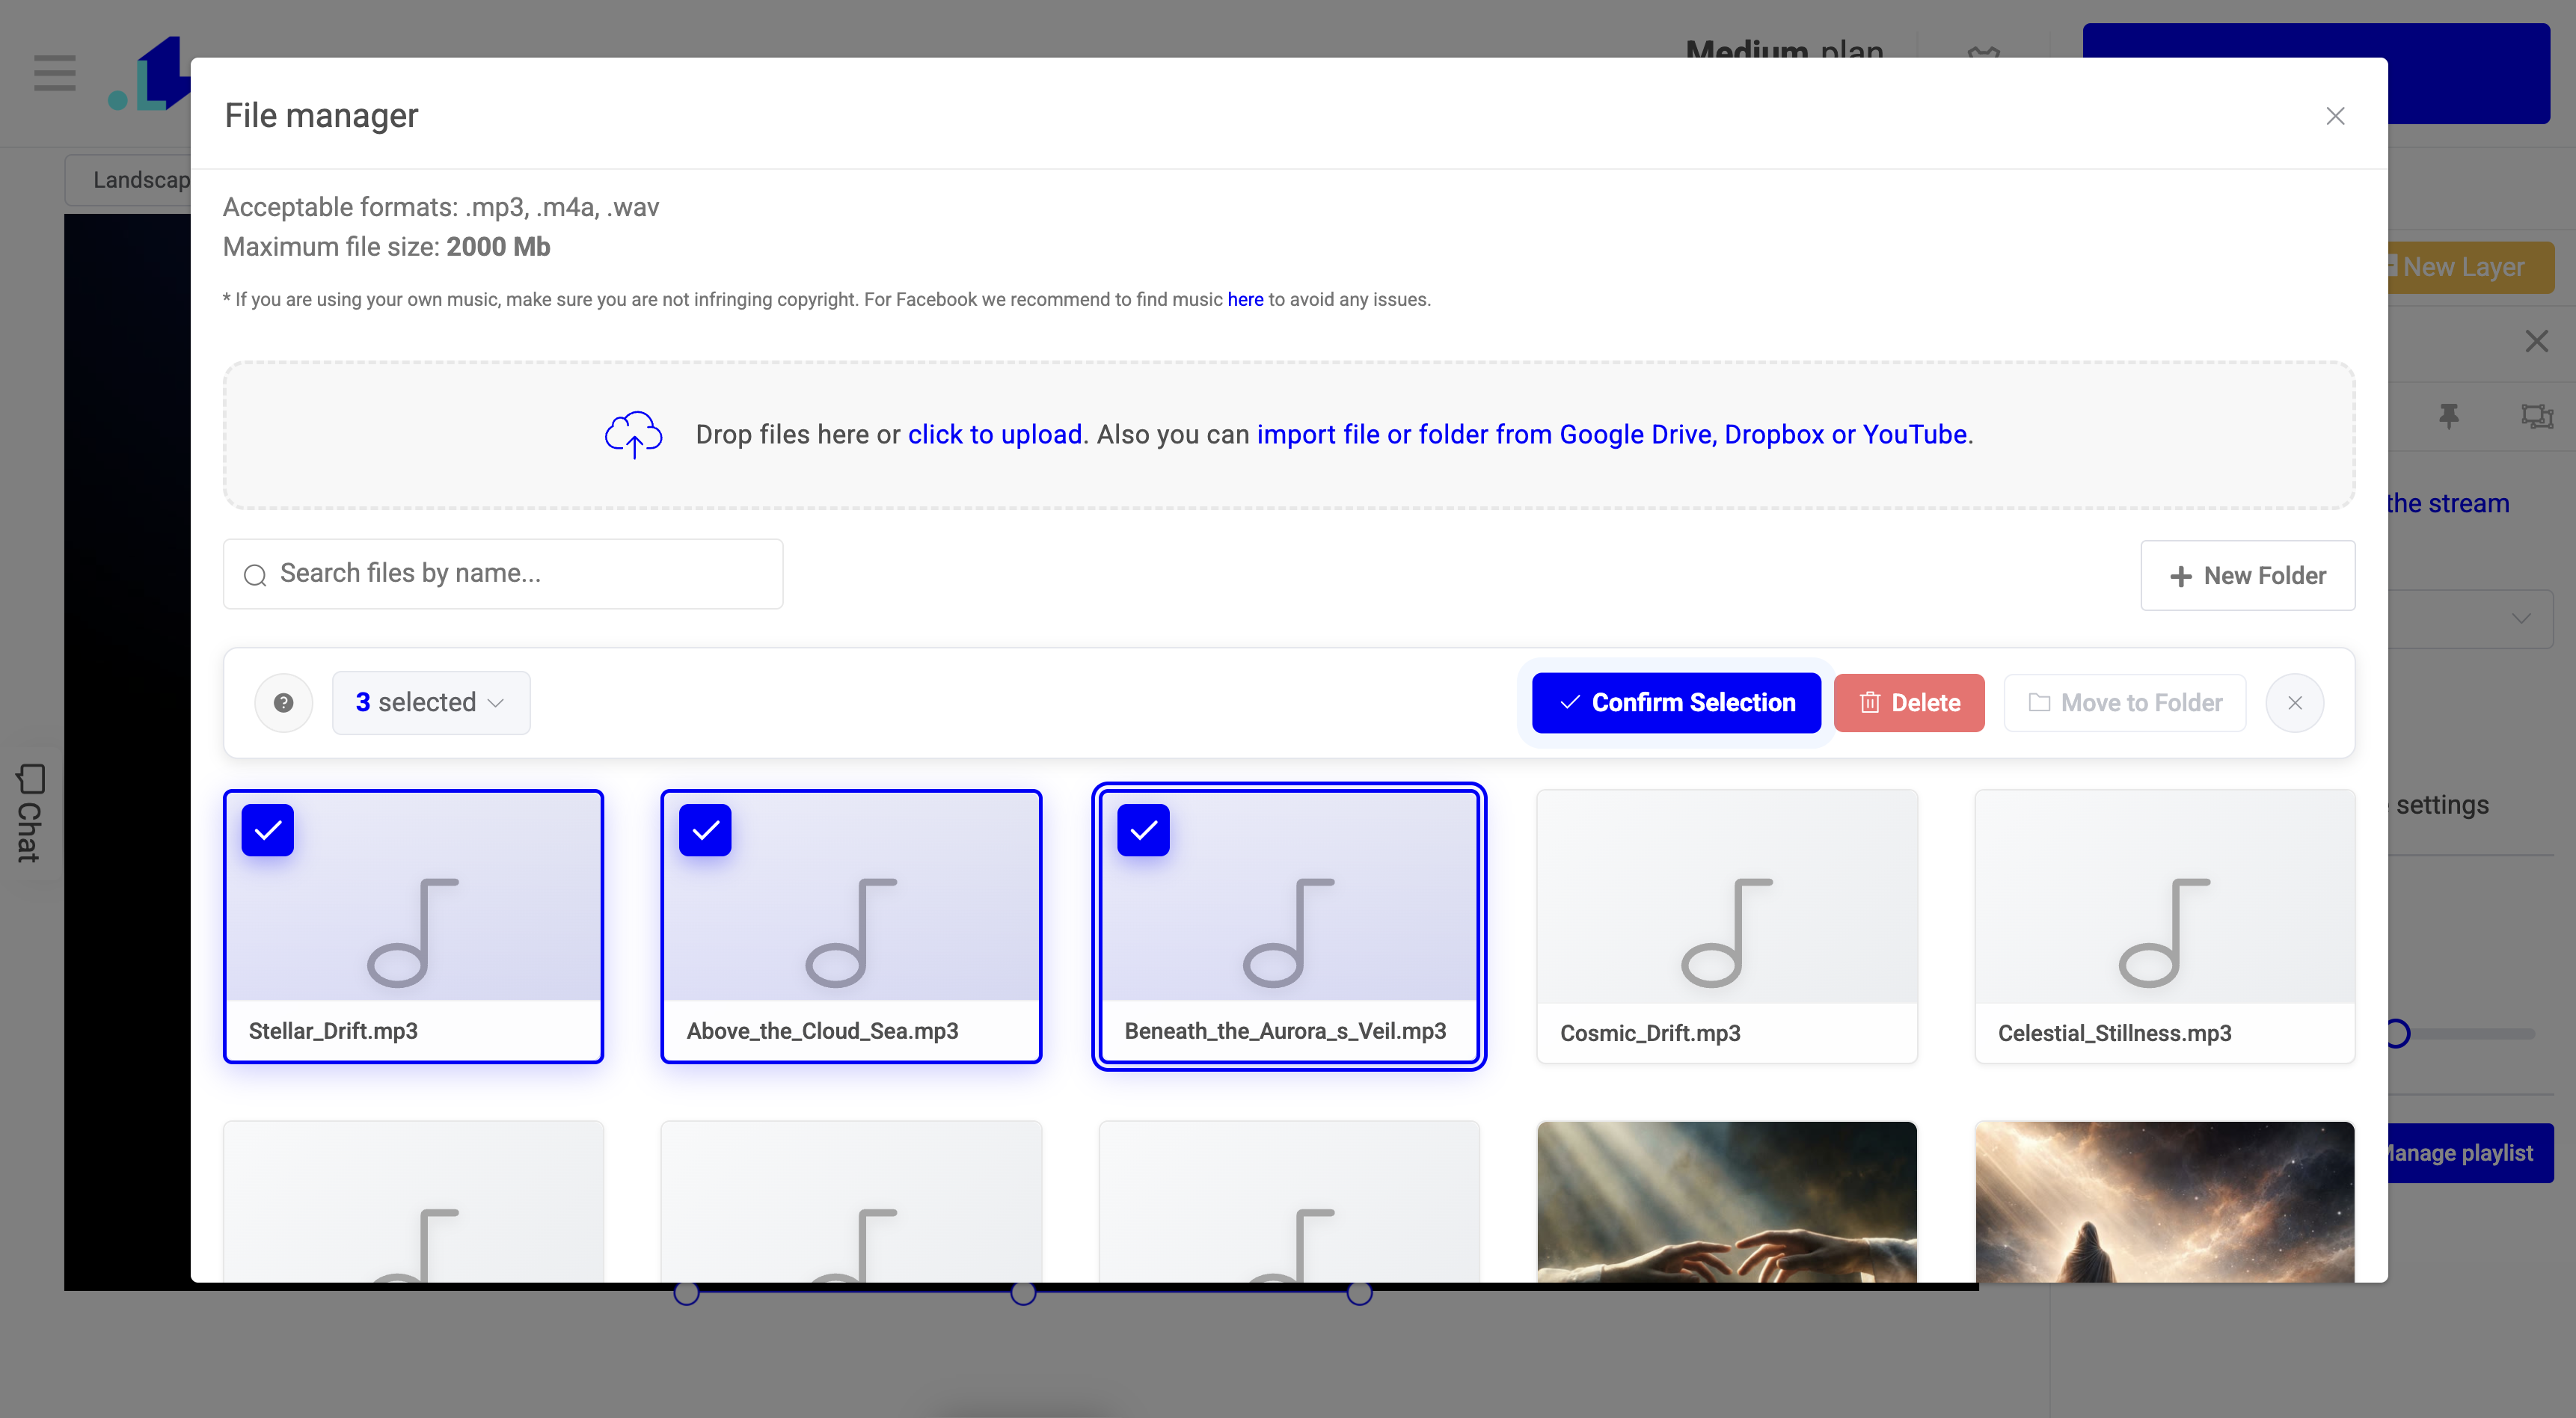
A new audio playlist layer appears on the canvas. The file manager will open automatically, where you can select the desired audio files you want to add to the audio playlist.
Adding Audio Files
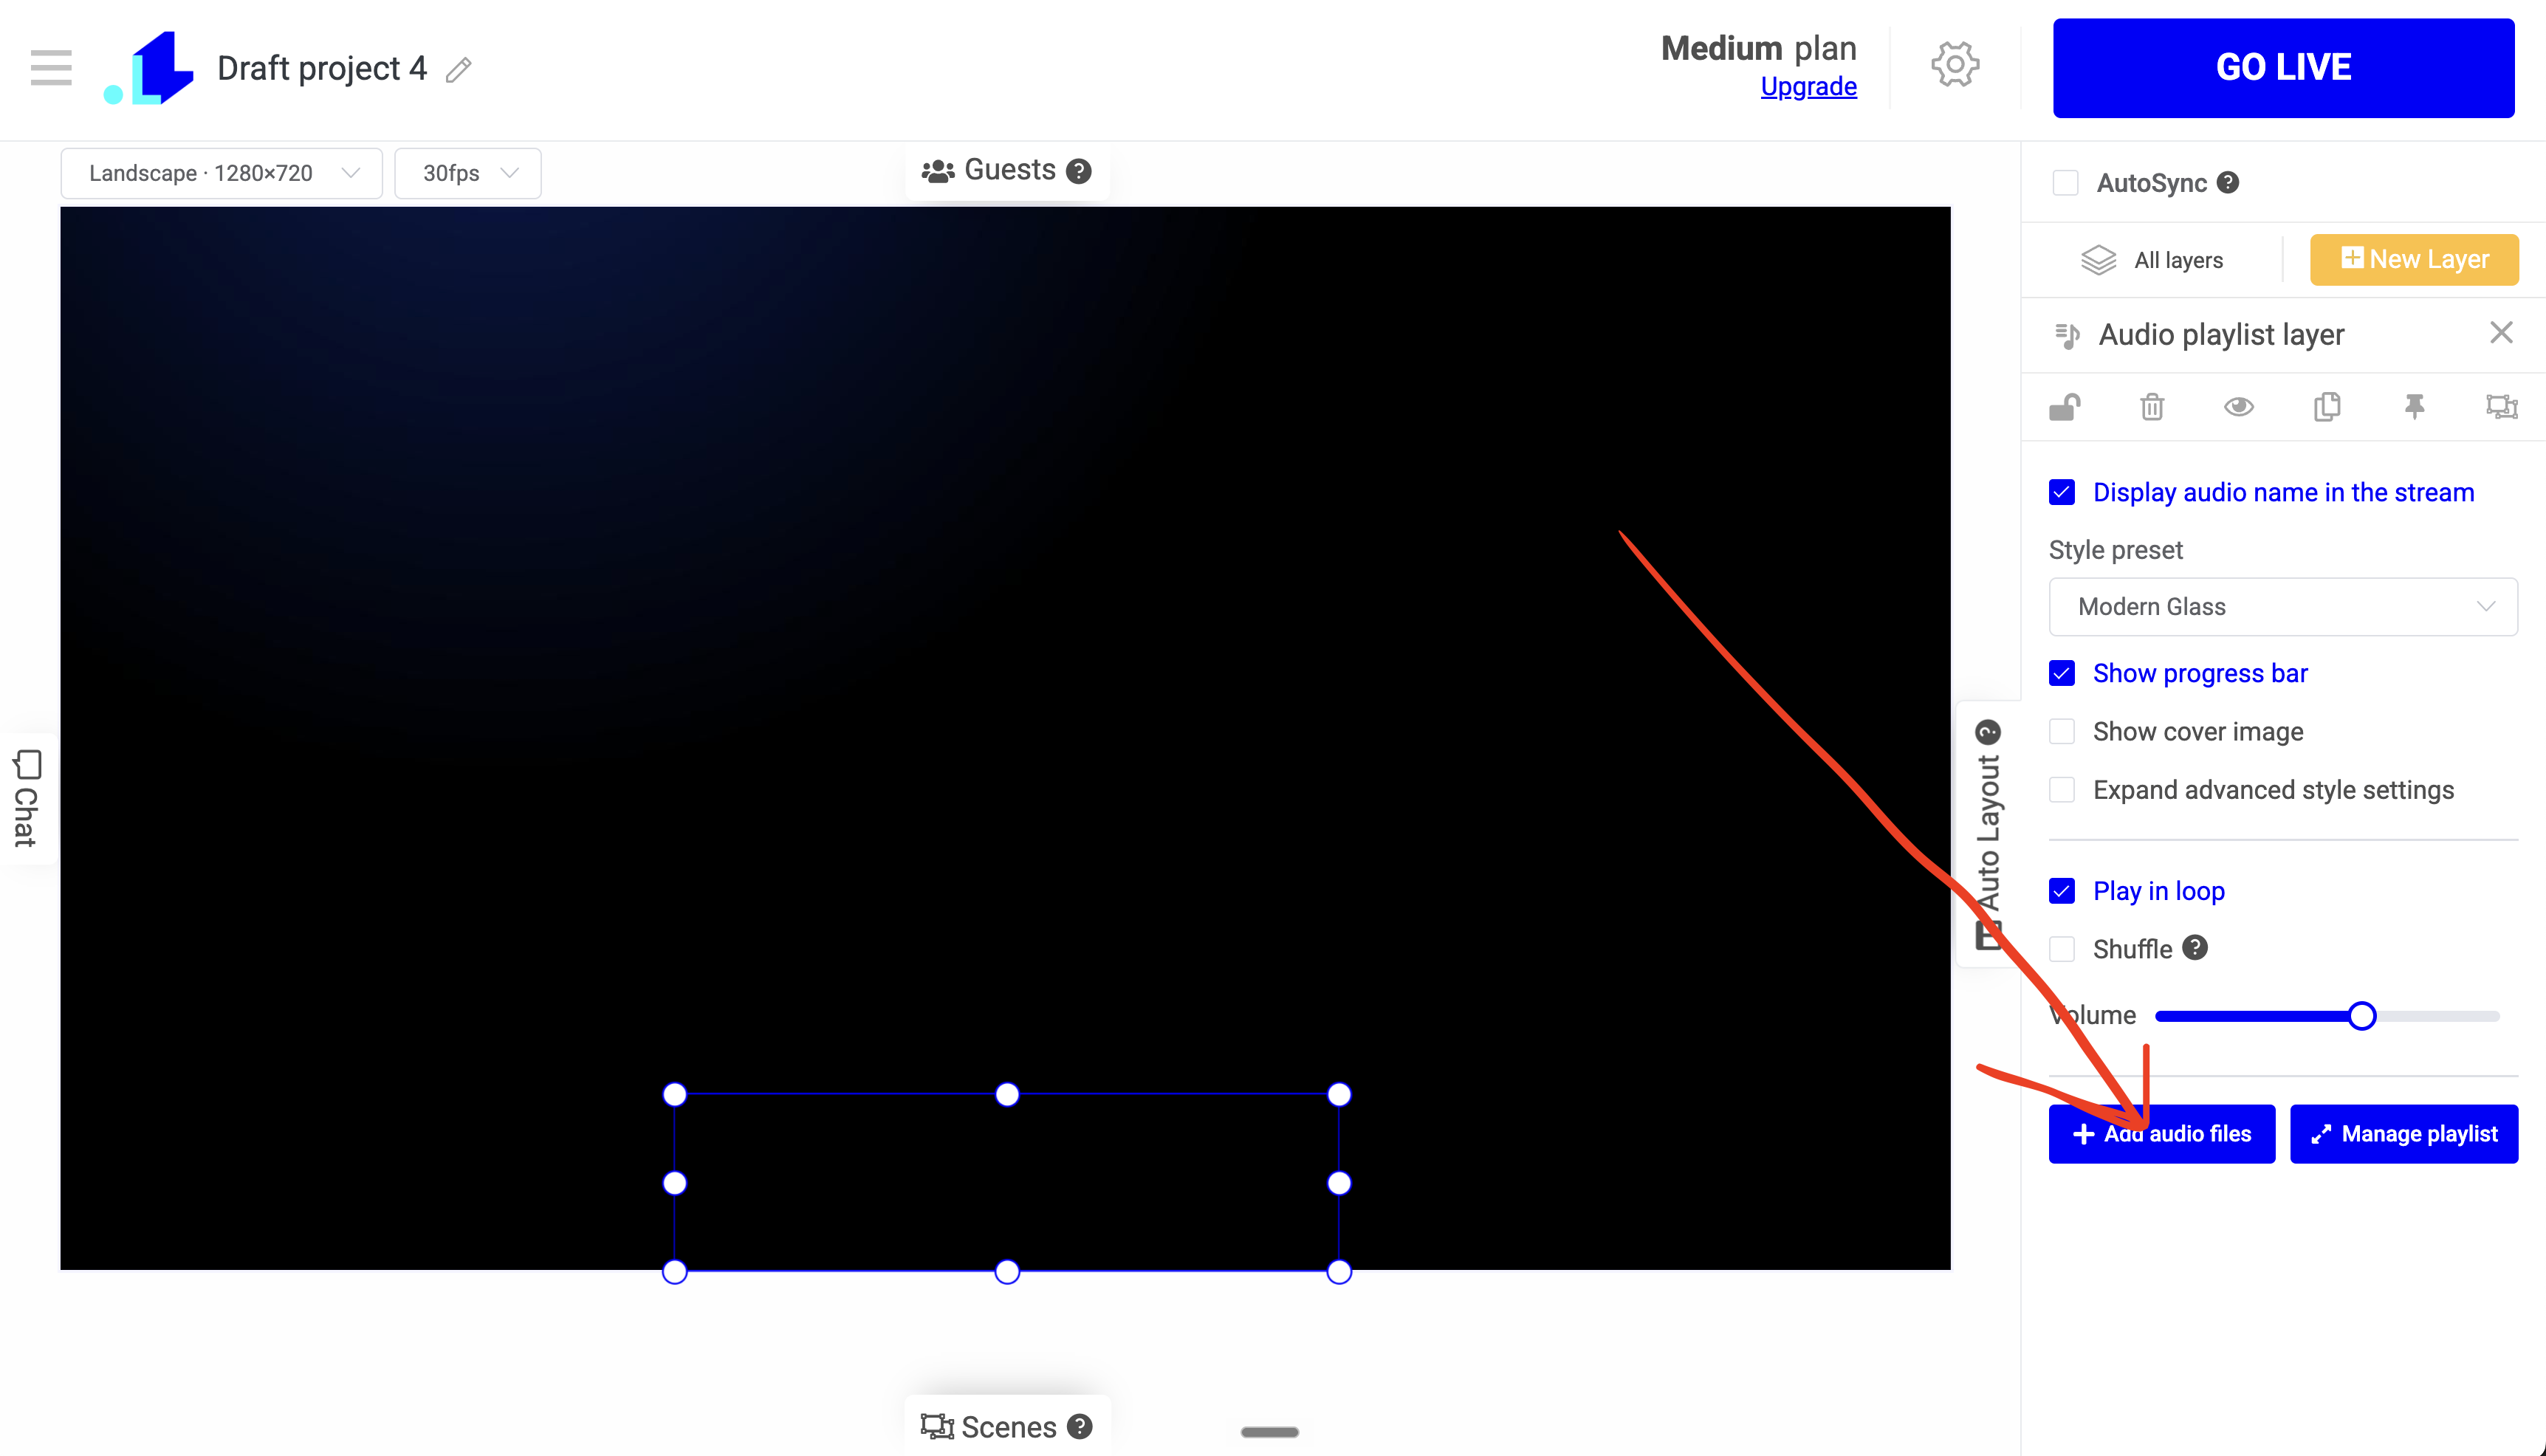
To add new audio files to your playlist, click Add audio files near the bottom of the sidebar settings to open the audio gallery. Select one or more files (multi-select is supported) — they're added to the playlist in the order you pick them, and the first upload starts playing automatically.
Each track appears in the list below the buttons. From the list you can:
- Reorder tracks by dragging the handle on the left
- Play / pause a track with the button beside its name
- Rename or Remove a track from its hover actions
- The currently playing track is highlighted with a progress bar and a live time readout
Tip: When the playlist becomes empty, the audio gallery reopens automatically so you can add more tracks.
Configuration Options
All playback and display settings live in the layer's sidebar panel.
Display audio name in the stream
When enabled (default), the current track's name is shown on the canvas. This reveals the styling options below.
Style preset
Pick a ready-made look for the track name from the Style preset dropdown. The default is Modern Glass (a translucent, blurred panel).
Show progress bar
Displays a thin progress bar beneath the track name that fills as the track plays. Default on.
Show cover image
Shows embedded cover art (extracted from the audio file) next to the track name. Off by default. When enabled:
- Image size — slider from 30 to 180 px (default 50).
- Fallback — a default image shown when a track has no embedded cover art. Use Select / Change to pick one from your image gallery.
Expand advanced style settings
Reveals the full text-styling editor (font family, size, weight, color, background, alignment, padding) for complete control over the track-name display.
Play in loop
When enabled (default), the playlist restarts from the first track after the last one finishes. When disabled, playback stops at the end of the list.
Shuffle
Plays tracks in random order. A new random order is generated each time the playlist loops, and the order is deterministic (seeded), so the editor and the live stream stay in sync.
Volume
Sets playback loudness on a 0–10 scale (default 6). Raising the volume above 0 automatically unmutes the layer.
Managing the Playlist
Click Manage playlist to open the Audio Playlist Manager — a full-screen dialog for working with large playlists.
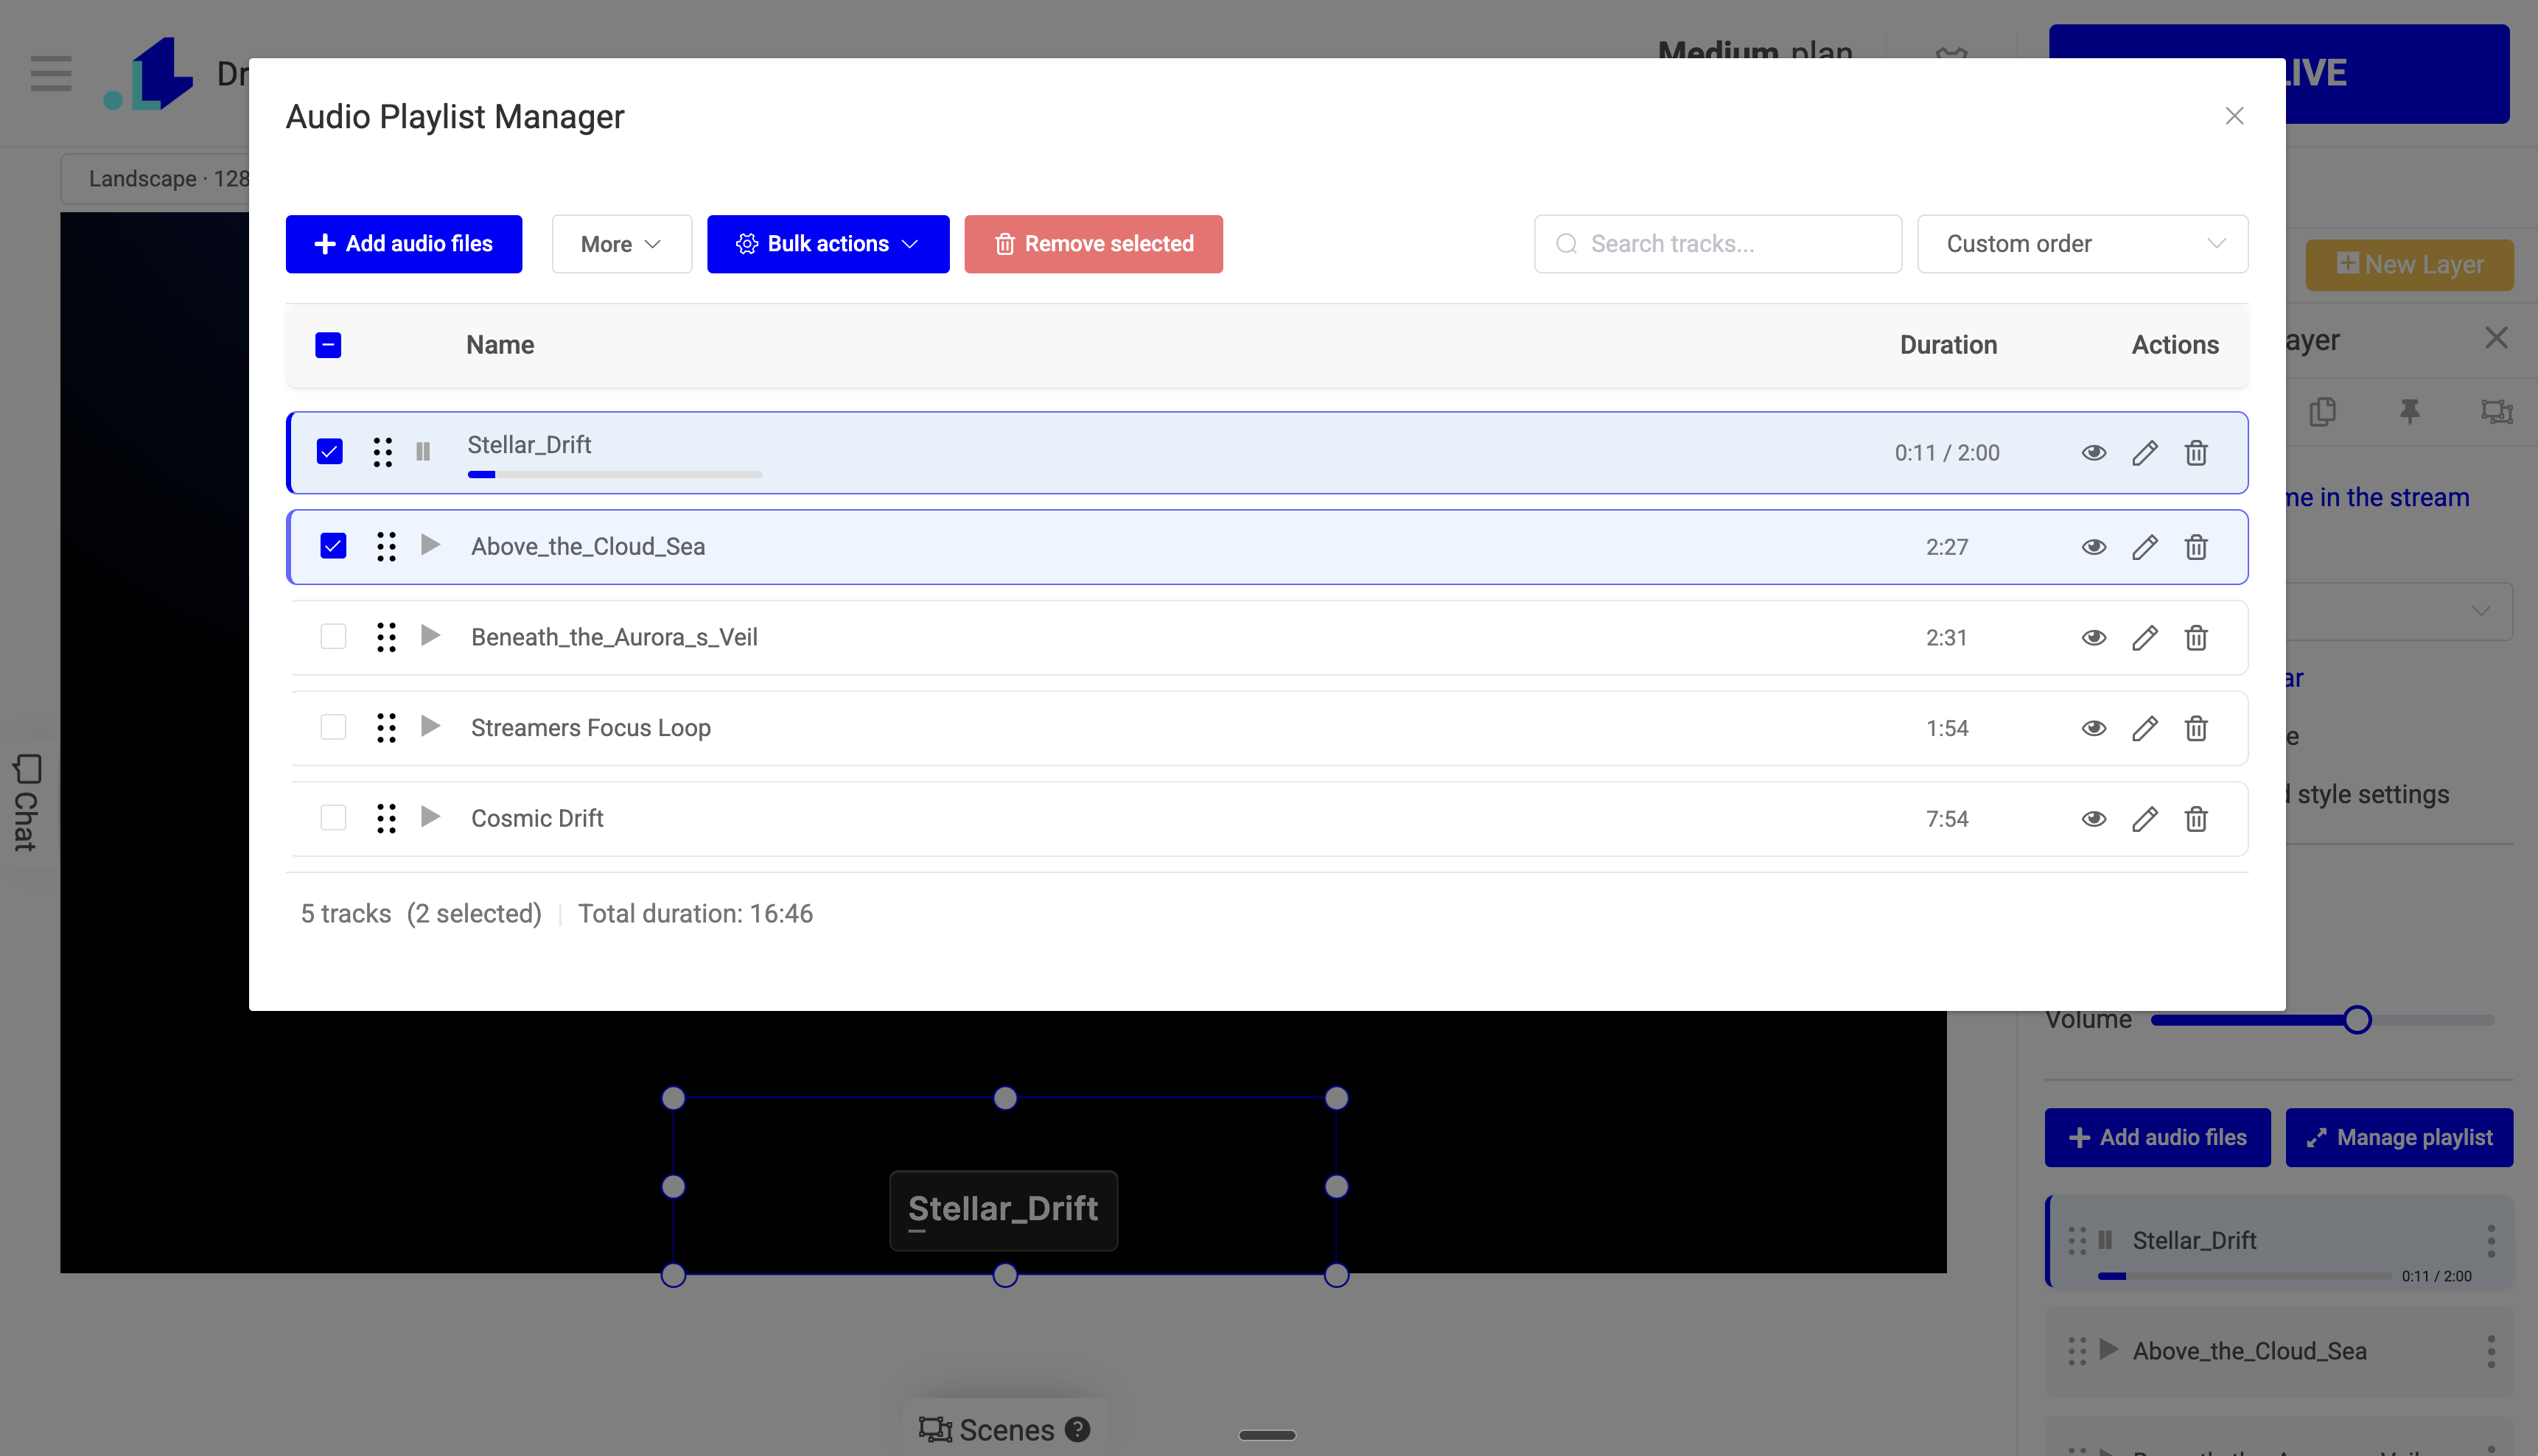
Search and sort
- Search tracks… filters the list by name as you type.
- Sort by offers Custom order, Name (A–Z), Name (Z–A), Duration (shortest first), and Duration (longest first).
- Choosing any sort other than Custom shows Save Order and Cancel. Save Order bakes the sorted order into your playlist as the new custom order; Cancel discards it.
Note: Save Order never drops tracks — it always saves the entire playlist, even when a search filter is narrowing what's visible.
Reordering
Drag any row by its handle to reorder. Drag is disabled while a search filter is active or a non-custom sort is staged (to protect your saved order) — clear the search or return to Custom order to drag again.
Multi-select and bulk actions
Use the row checkboxes (or the header checkbox to select all visible rows) to select multiple tracks. Once tracks are selected:
- Bulk actions → Move selected to beginning / Move selected to end repositions them as a group.
- Remove selected deletes them all at once.
Per-track actions
Each row has:
| Control | Action |
|---|---|
| Play / Pause | Play or pause the track (live progress and current / total time show while playing) |
| Preview (eye) | Auditions the track in a small player without affecting the editor or live stream |
| Rename (pencil) | Rename the track |
| Remove (trash) | Remove the track from the playlist |
The footer shows the track count, how many are selected, and the total duration of the playlist.
Importing a Track List
Instead of adding files one by one, import a whole playlist from a spreadsheet. In the manager, open More → Import Track List.
- Download the template — click Tracks Only to open a ready-made sheet with a title column.
- (Optional) Search in folder — scope matching to a single gallery folder. Useful when you have same-named tracks in different folders.
- Upload your .csv or .xlsx file (drag-and-drop or click).
- Click Import.
Each row's title is matched exactly against the names of audio files you've already uploaded to your LiveReacting File Manager. Matched tracks are added to the playlist.
Important: Track names in your spreadsheet must exactly match the names of files already uploaded to your account. Upload all tracks first, then import.
If some titles can't be found, a Missing Tracks dialog lists them. Use Copy List to copy the missing names so you can upload them and re-import.
Exporting a Track List
Open More → Export Track List to download the current playlist as an .xlsx file with two columns — Track Title and Duration (HH:MM:SS). This is handy for backing up a playlist or reusing it in another project via import.
How Playback Works
- Tracks play in sequence; only the current and next track are loaded at a time to keep memory low on long streams.
- On a track's end, the playlist advances to the next one — wrapping to the start when Play in loop is on, or stopping at the end when it's off.
- With Shuffle on, a seeded random order is used, and a fresh order is generated each loop.
- Tracks that fail to load are skipped automatically (and retried periodically during a live stream).
- The on-screen display shows the current track name, optional cover art, and an optional progress bar; long names scroll.
